
 Photograph taken by Sarah Jayne Photography.
When Frank and I got engaged in May of 2013, the very first thing I did was plan a visit to a local bridal shop to try on wedding gowns. I was so excited that I booked an appointment a mere week later. When the day arrived, I quickly found myself surrounded by a sea of tulle, beads, and lace, in too-tight polyester nightmares which left me feeling breathless – and not in the good way.
I managed to try on half a dozen vastly different gowns before leaving the store. I was feeling disappointed, sticker-shocked, and uncomfortable… but the one thing I was sure of was that I did not want a strapless gown – weren’t they so “typical”? (Not to mention, I was convinced that my petite frame couldn’t pull off the strapless look; it probably didn’t help that all of the sample gowns were 8 sizes too big for me.) At that point I decided to spare myself from further dress shopping, and start the process of making my own wedding dress.
You might be thinking, “Is she nuts?” Well, maybe I am, a little…but I did graduate from FIDM with a degree in Fashion Design, so I had that knowledge working for me! Granted, we never made wedding gowns…or anything remotely similar.. but, nothing ventured/nothing gained, right?
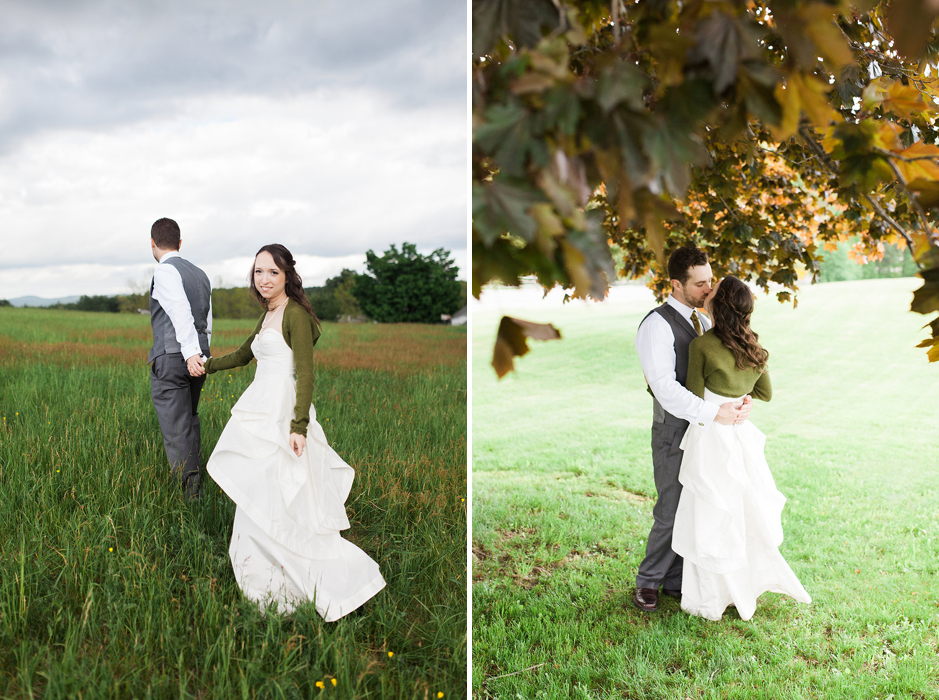
 Images by Sarah Jayne Photography.
Before I got started, I had one major hurdle: I’d already made my wedding necklace – hand formed clay roses accented by vintage faceted glass beads and freshwater pearls – and I had my heart set on wearing a gown that coordinated with it. Clearly this situation is different from the “normal” bride who picks out her accessories after she has her gown, but I am a full time jewelry designer – thus my priorities are a little different than most!
 Images by Sarah Jayne Photography.
I spent some time that summer draping different silhouettes onto my dress form, and researching various fabric options and notions. For a while, I was still convinced that strapless wasn’t for me.
Then one magical creative day, design inspiration struck: I had draped a sweetheart neckline bodice (with the full intent of adding straps to the design,) and on a whim, added a curved trim piece to the top of the bust line. Suddenly my design vision was clear – the curved trim on the neck line was the perfect way to mimic the roses from my necklace, without screaming “floral” from the bridal rooftops! I tried on the sample top along with my necklace, and was excitedly surprised at how truly fitting it looked.
I finished sewing my sample by giving the bodice a natural waist line to accentuate my figure, along with a dramatic A-line silhouette with an over-sized layered flounce and modern wide hem trim. I knew I had a winner; I was elated! Our wedding theme was to be a mix of vintage and modern, with a trend of looped ribbon elements, and this design was a perfect fit for both myself and our big day. I happily pranced around in my sample gown while showing it off to my parents over a Skype video-chat. I think that is what most brides must have felt like when they tried on The One!

Now that my design was solidified and I had made final fit adjustments, I had to get to work on patternmaking. The above images show the sample I draped for the oversized flounce idea. This was one very long piece of fabric (cut on the bias grain line, in a circular shape) with large folds in specific places in order to create the “layered” look all the way around the waist line. I made two of these pieces – one for each side, starting at the center front waist line and ending at the center back. The really difficult part about this was making sure I marked my sample in a logical way in order to transfer the fold placement markings to my pattern, and then to my final fabric. Yikes! If you can’t see from the images, I used a different colored pencil for each fold grouping.

Reminiscent of my FIDM patternmaking days, our pup Butters always takes the opportunity to lend a helping paw. Or, you know, distract me from getting my work done. Transferring the muslin pattern piece to the paper pattern gave me the opportunity to make some corrections in length. This piece shows a portion of the flounce. The final pattern piece looked like a giant elongated “C” shape.

Between the outer silk fabric (Italian ivory silk taffeta) and the silk chiffon lining, I’d lost count of how many pattern pieces went into this design. I’d included princess seams (my favorite!) on both the front and back of the bodice, plus both center front and horizontal seams on the bust section.

Honestly, one of the most rewarding parts of designing – for me personally – is sewing in the final fabric! (This outer layer is referred to as the “self” fabric.) It feels amazing to put the pieces together and see the garment come to life. The image above is the silk self layer of the bodice, still in progress.

This was a close-up shot in progress of the middle layer of the bodice, which holds the boning. I used plastic boning, since I didn’t need super heavy-duty boning for this garment.

For the hem of the flounce pieces, I added in horsehair braid. Nowadays this is made with a flexible nylon material, not actual horse hair. It’s very stretchy and fun to play around with! It helps add volume to your hem lines by flaring them away from the garment.

At this point, I was working on the hem of the skirt portion. The ideal way to do this would have been with long strips of my silk cut on the bias, but I was on a budget and wasn’t able to purchase all of the additional yardage I would have need to accomplish that. Instead, I did it the hard way!

One of my favorite parts – notions! I found these beautiful vintage glass shank buttons from a shop on Etsy. I had exactly two of them left over after finishing my gown, and used 1 button in each of the two silk flower corsages I made – one for my mom, and one for my mother-in-law. I’ll post pictures of those later on. The close-up shot here was before I added the hook-and-eye closure at the top. I just really love these buttons! They looked great with the vintage glass on my necklace, and are so beautiful and unique.

I spent about four hours hand stitching each of the flounce hems closed with a catch stitch. Each length was multiple yards long! I would venture to say that it was one of the most tedious parts of this process. Although I find hand finishing hems rather relaxing, I did spread it out over the course of two weekend days, so as to not put too much strain on my body or eyes. After I finished them, it was time for another test fitting for length! I wanted it to be floor length, and had quite a bit of extra fabric to remove. It’s always better to initially have it too long than too short, though!

A friend of mine who was a fellow FIDM classmate assisted me with finalizing the hem length. You can do a lot of work yourself, but I would never advise measuring a hem on yourself, for yourself, alone. She did a fantastic job, and the length came out perfectly! For the finishing touch and that “something blue,” I added a little extra personalization by embroidered our wedding date and initials along the inside of the hem.
 Image by Sarah Jayne Photography.
Whew! That was a lot of work, but I really think it was worth it.. Don’t you? 🙂 If you’d like to see more images of my gown and our DIY handmade wedding day, please head on over to my full blog post about it, found here: https://victoriaallisonblog.wordpress.com/2014/08/14/diy-backyard-brunch-wedding-in-new-hampshire/


